Guided Cloudflare Installation
This path configures a public Linux VPS with a Cloudflare-managed domain. The installer checks Docker, discovers the public IP, configures DNS and wildcard TLS, writes .env, and starts the stack.
1. Prepare Cloudflare
Buy or transfer a domain to Cloudflare. Set DOMAIN to the zone apex, such as example.com, not a nested name such as airlock.example.com.
Cloudflare Universal SSL covers the zone apex and one wildcard level: example.com and *.example.com. Airlock creates app subdomains under DOMAIN. If DOMAIN=airlock.example.com, an app would use app.airlock.example.com, which Universal SSL does not cover. A nested DOMAIN requires a certificate that explicitly covers *.airlock.example.com.
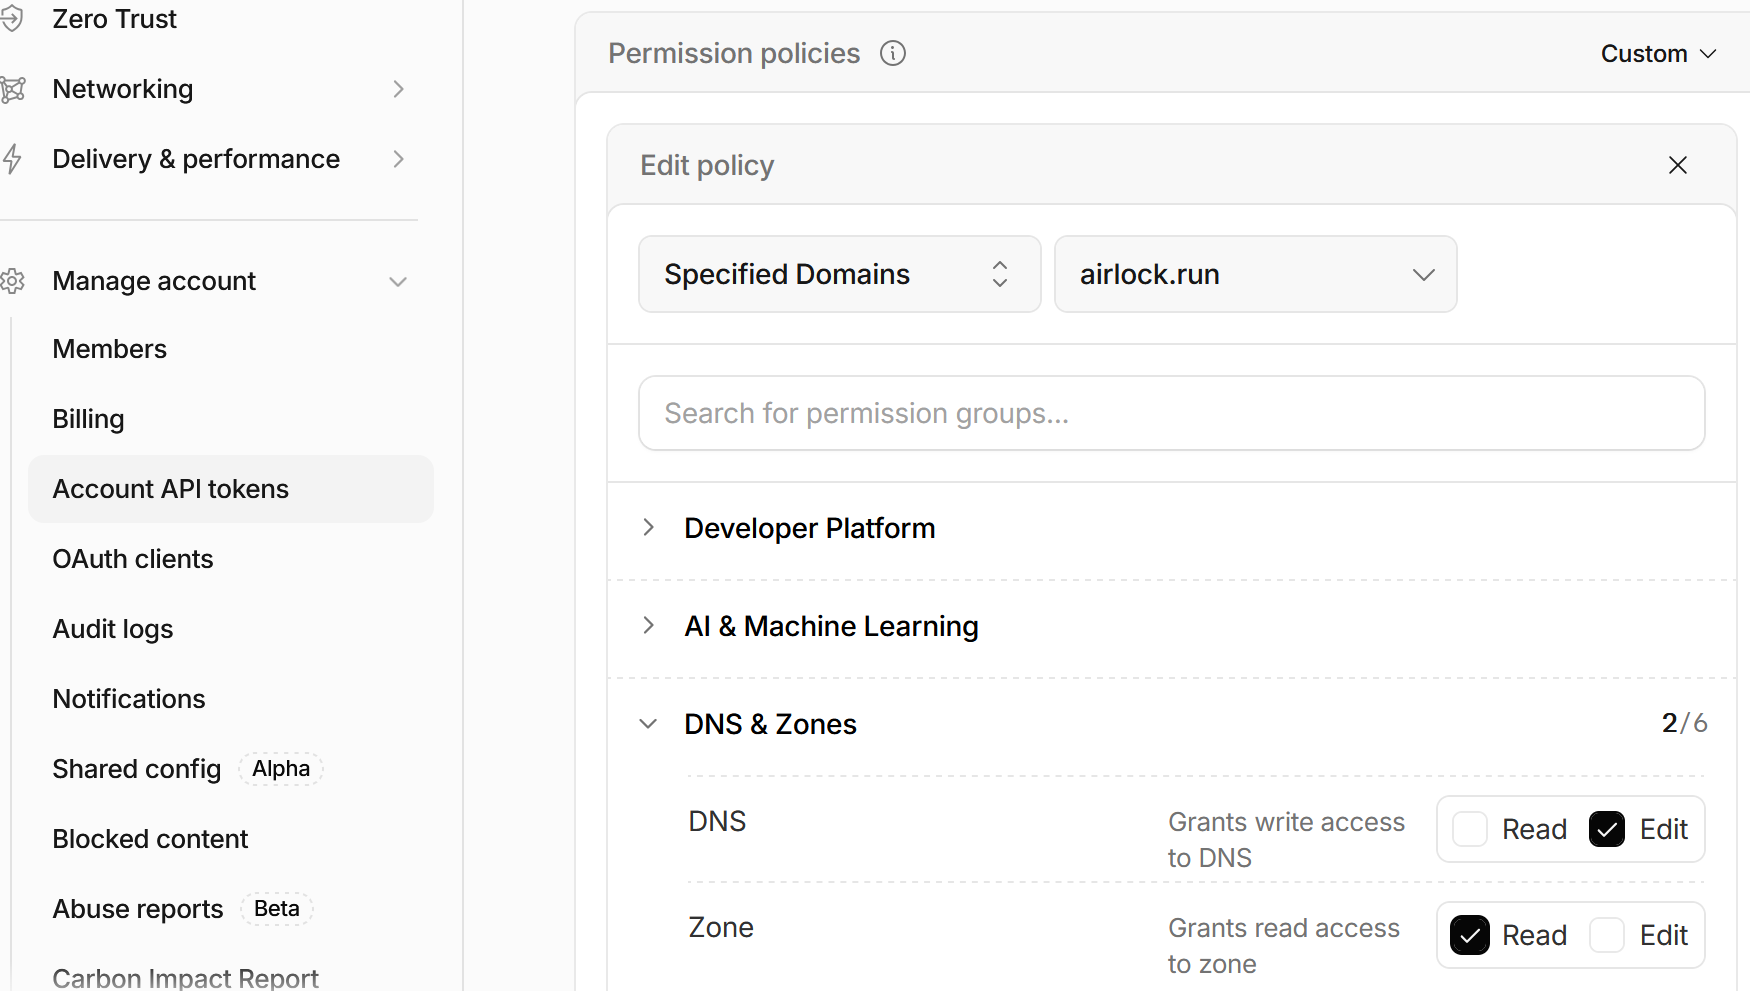
Create an API token scoped to the domain’s zone with these permissions:
Zone:DNS:EditZone:Zone:Read
The installer uses the token to find the zone, create the apex and wildcard DNS records, and issue a DNS-01 wildcard certificate.
1.5 Optional: Host without a public IP
Use Cloudflare Tunnel when Airlock runs behind NAT, on a home server, or on any machine that cannot accept public inbound traffic.
- In Cloudflare, open Zero Trust and activate the free plan for the account.
- Open Networks > Connectors > Add a tunnel.
- Select Cloudflared, name the tunnel, then select Docker as the connector type.
- Copy the generated
docker runcommand. The installer extracts the tunnel token from it.
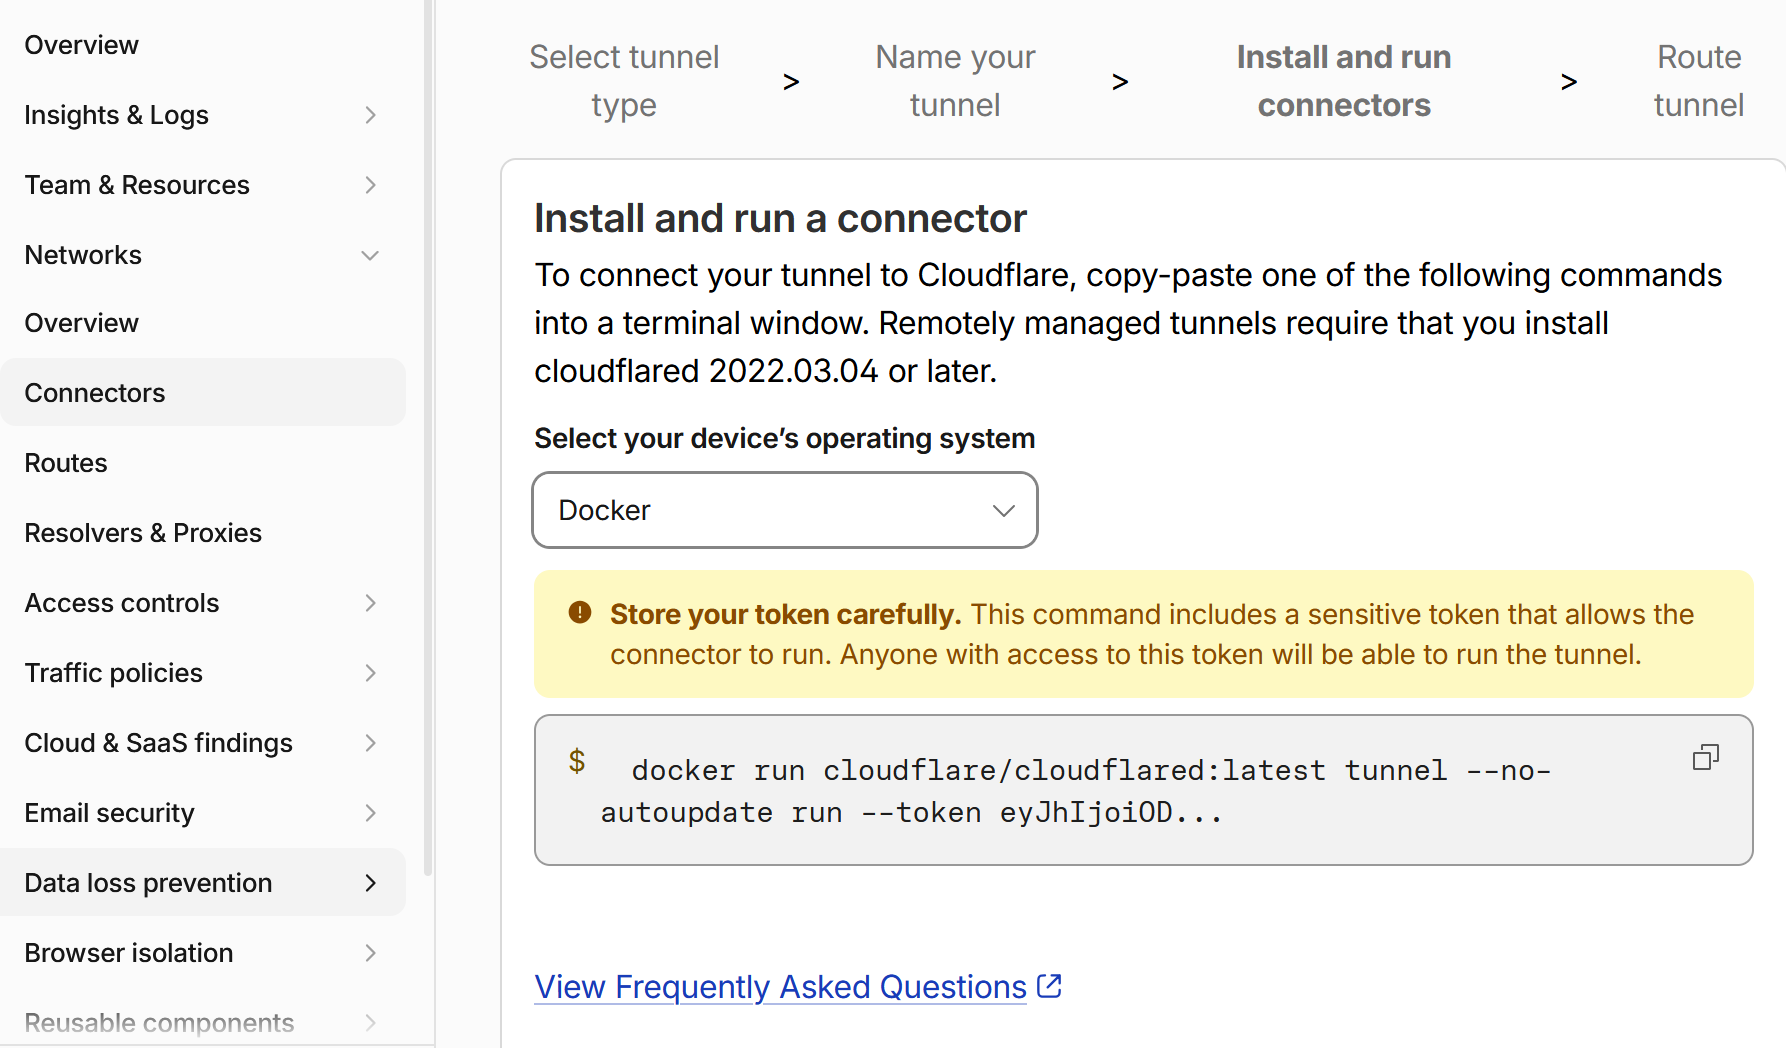
Run the installer with Cloudflare Tunnel forced, then enter the domain and paste the copied command when prompted:
curl -fsSL https://raw.githubusercontent.com/airlockrun/airlock/v0.4.0/install.sh | bash -s -- --cloudflaredThe installer extracts the tunnel token, configures the private Caddy and Cloudflared services, and starts Airlock. After Airlock starts, Cloudflare waits for the connector before allowing routes to be added.
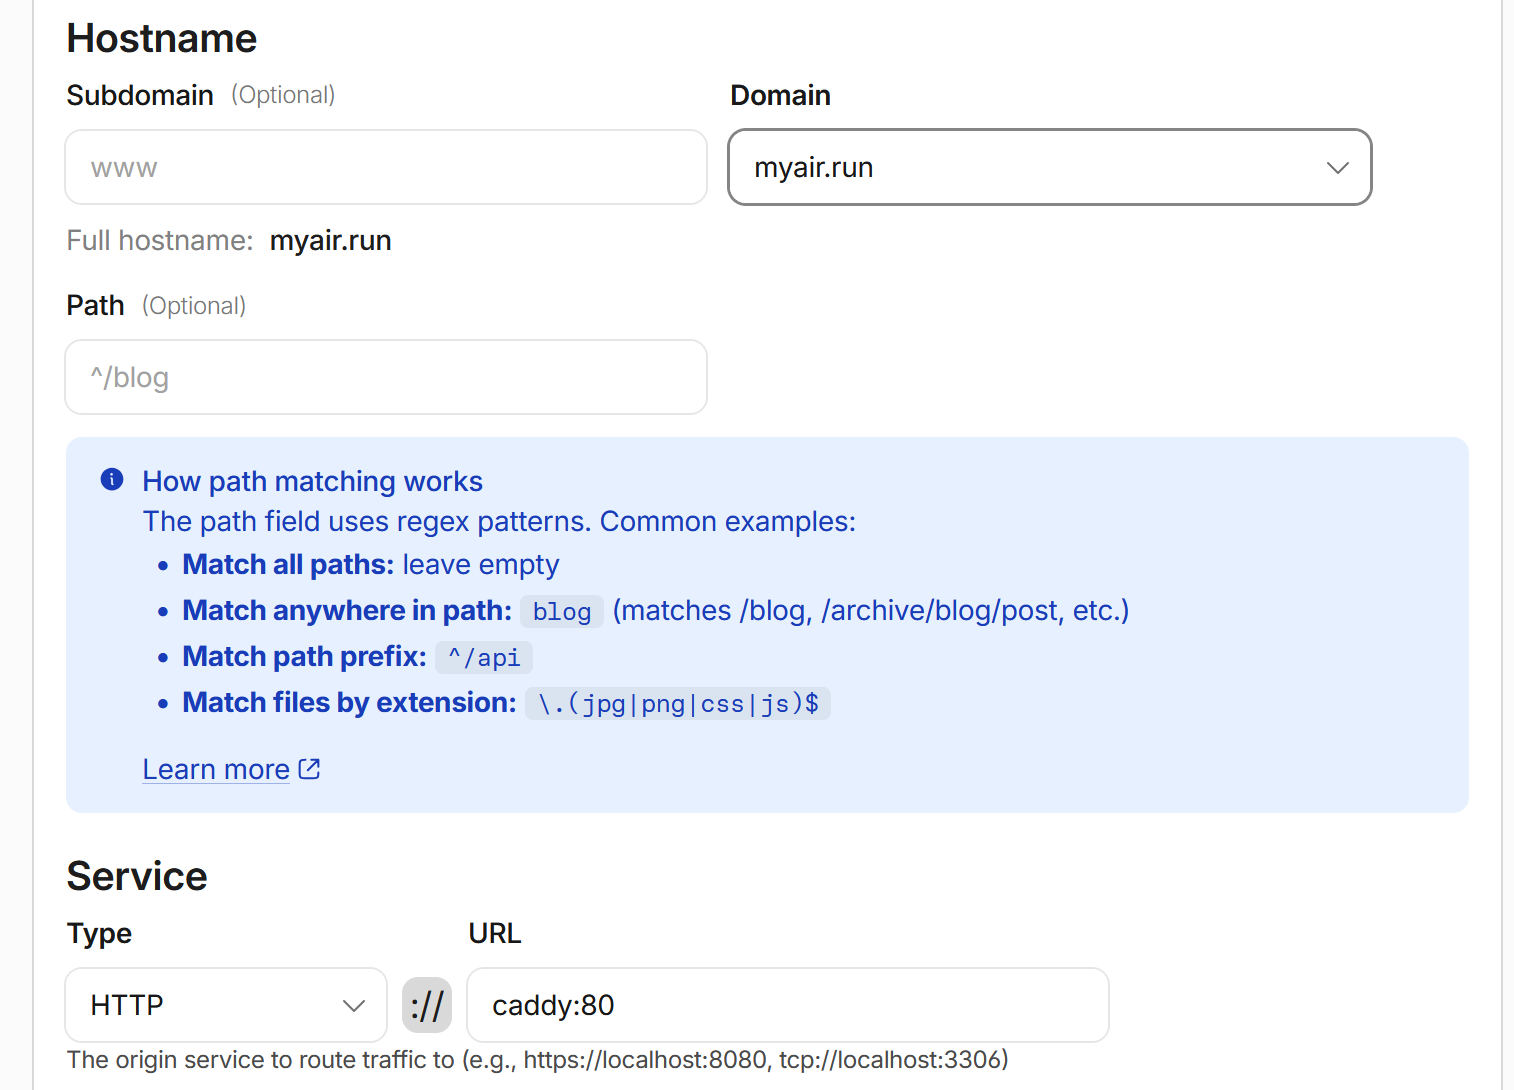
In the tunnel’s Public Hostnames settings, add these routes, each pointing to
http://caddy:80DOMAIN*.DOMAIN

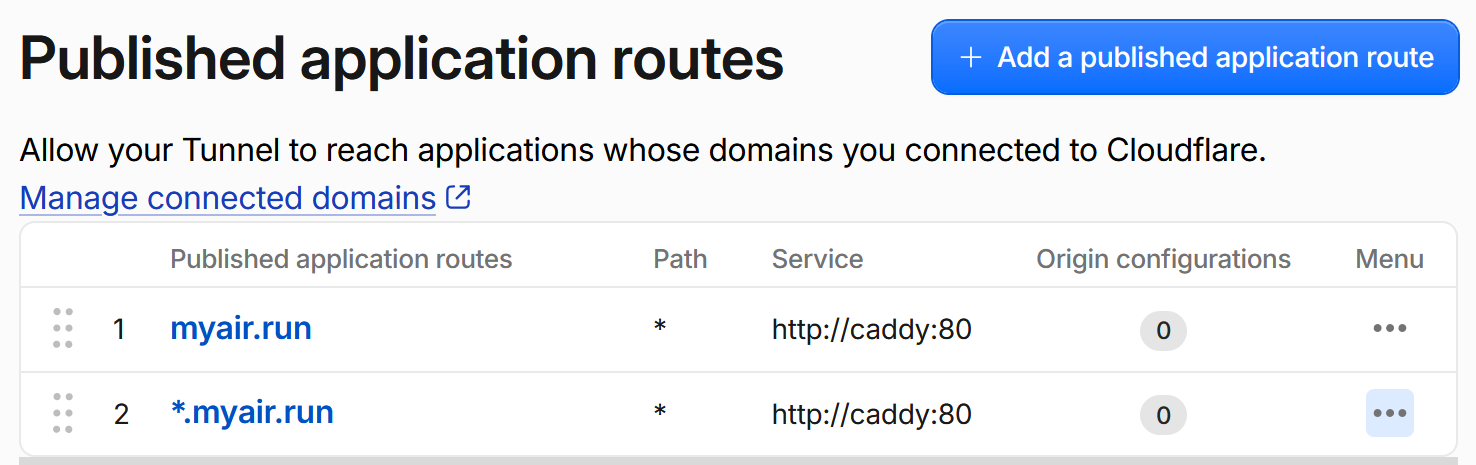
- Open DNS > Records. Adding the apex tunnel route creates the apex DNS record, but the wildcard tunnel route does not create the wildcard DNS record. Add a proxied wildcard
CNAMErecord:- Name:
* - Target: Copy the target from the auto-created
DOMAINtunnel record. It looks like<tunnel-id>.cfargotunnel.com. - Proxy status: Proxied
- Name:
Cloudflare can display the existing apex record as type Tunnel. Its target is the value to copy into the wildcard CNAME. Do not point the wildcard record at DOMAIN; point it at the same tunnel target.
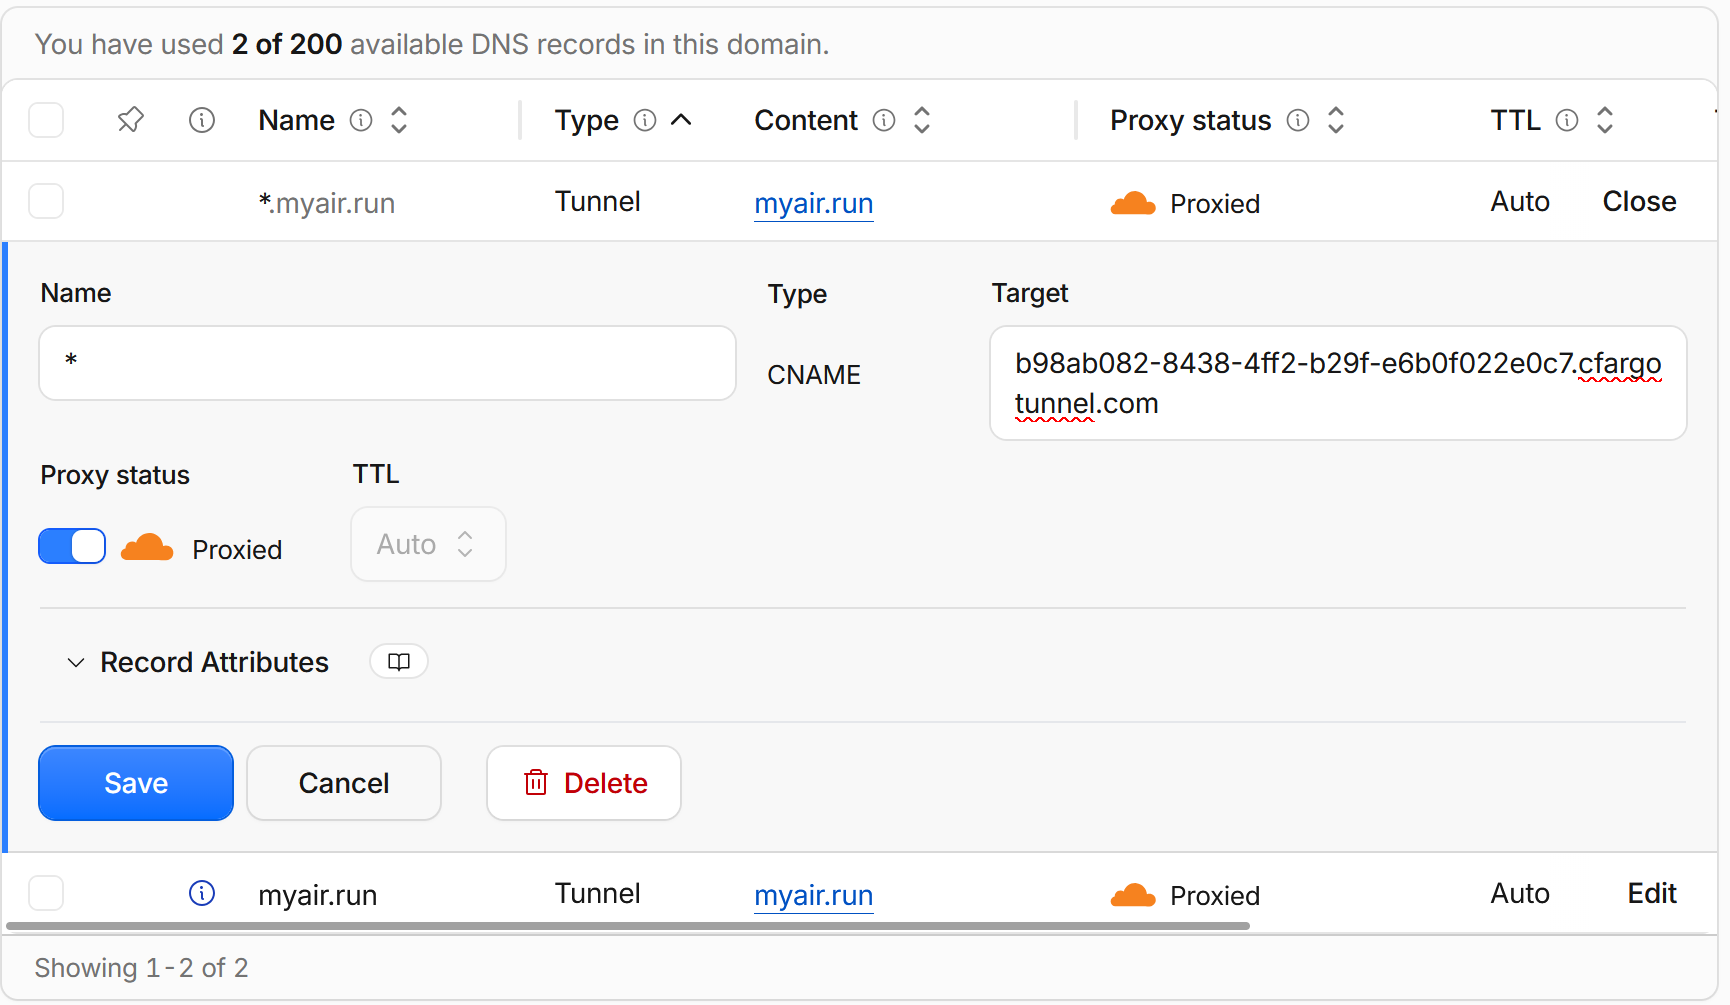
Cloudflare terminates TLS at its edge. Airlock’s Caddy container remains private on the Docker network, and Cloudflared is the only public ingress.
2. Prepare the VPS
Complete the Linux VPS prerequisites. Use a Linux VPS with at least 2 vCPUs, 4 GB RAM, 40 GB of disk space, and a user with sudo access.
3. Run the installer
curl -fsSL https://raw.githubusercontent.com/airlockrun/airlock/v0.4.0/install.sh | bashAnswer the prompts with the Cloudflare domain and API token. The installer checks whether the domain resolves to the VPS public IP, offers Cloudflare DNS and wildcard TLS configuration, then asks whether to bundle Postgres and object storage.
4. Activate Airlock
After the installer health check completes, follow the activation guide to create the first administrator account and configure providers, defaults, and optional Telegram access.
Keep the generated .env private. It contains encryption keys, database credentials, and the Cloudflare API token.
Upgrade
Run upgrades from the checkout created by the installer:
cd ~/airlock
./upgrade.sh
The upgrade retains .env, applies database migrations at startup, and restarts the stack. Back up Postgres before a production upgrade.