Create an App
Open Apps in the Airlock dashboard and select Create App. Give the app a name and slug, then choose one of three creation paths.
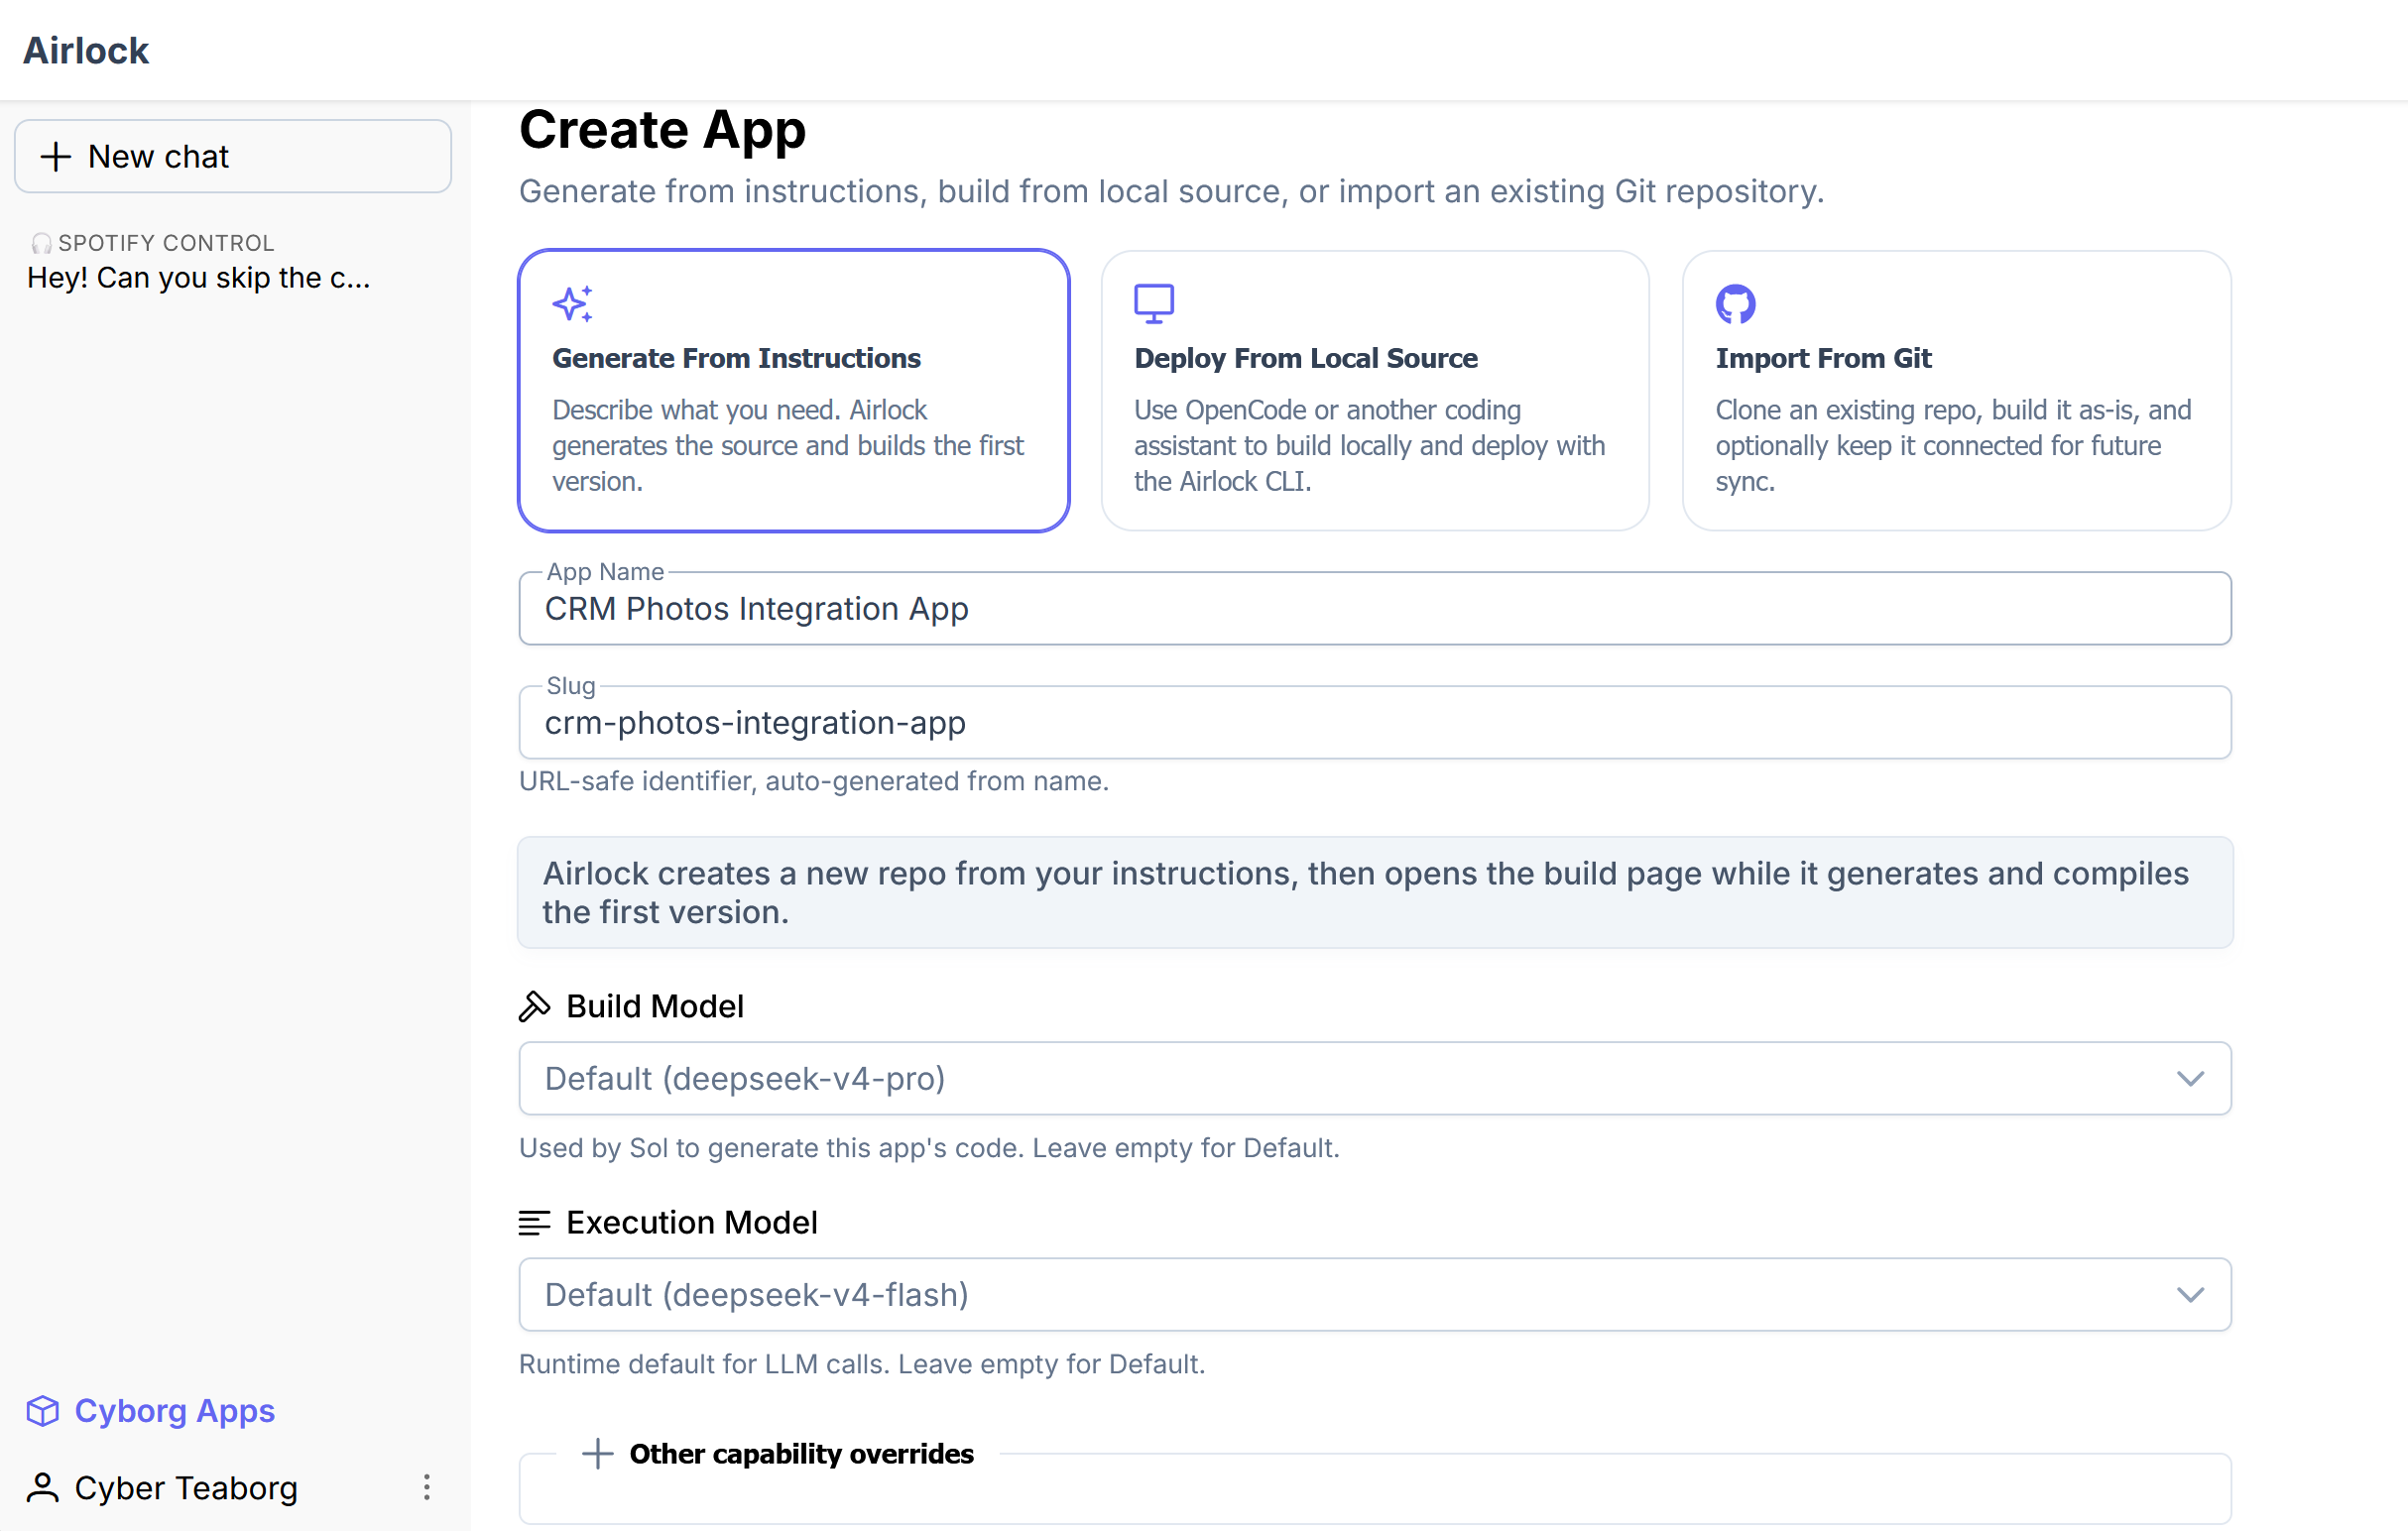
Generate from instructions
Choose Generate From Instructions when you want Airlock to scaffold and build an app from a description. Enter what the app should do, choose optional model overrides, then select Generate App.
Airlock creates the source project, runs the build, and opens the build activity when it starts. When the build succeeds, the app becomes active.
Deploy from local source
Choose Deploy From Local Source when you want to build with Cursor, Claude Code, OpenCode, or another coding harness on your own machine.
The page provides setup commands for the Airlock CLI and a prompt-ready workflow. The CLI creates a local app repository, logs into this Airlock instance, installs the app toolchain, builds the source, and deploys it.
Use this path when you want the full local IDE workflow while Airlock provides the hosted runtime, deployment, and integrations.
Import from Git
Choose Import From Git when the source already lives in a remote repository. Select a stored Git credential, provide the remote URL and branch, then choose the source mode:
- Read/write: Airlock can push code changes to the remote.
- Read-only: Git is authoritative. Airlock follows the branch and does not change its source.
- Import once: Airlock copies the source once, then owns the imported copy.
Airlock imports the selected branch, builds it, and records future build activity on the app.
Choose models
The creation form uses the platform defaults unless you override them for this app. The two common overrides are:
- Build model: used to generate app code.
- Execution model: the default model for runtime LLM calls.
The advanced settings let you override vision, speech, image generation, embeddings, and web search when the app needs them.
Next step
After the first build succeeds, open the app to develop and deploy source changes.